White Unibody MacBook Bottom Case Fix: Upholstery

In 2009 Apple introduced a new polycarbonate unibody white MacBook to replace their older white MacBook body style. This new body was a plastic version of the aluminum unibody design earlier introduced in the MacBook Pro line.

Apple-MacBook-White-mid-2010Apart from being white plastic/polycarbonate, it looked more consistent with the MacBook Pro line and also got a one-big-button multi-touch trackpad, similar to the Pro models. It received a single hardware revision in 2010 before being phased out sometime in 2011 and replaced by the lower-cost 10-inch MacBook Air.

This is a great MacBook even in 2014/2015 and will run OS X 10.10 Yosemite just fine – especially if you replace its original hard drive with an SSD and have more than the introductory 2 GB of RAM.

However, the one catch for this MacBook body style is the rubber-covered bottom. I have yet to see one that doesn’t at least have some of the rubber layer being loose around the edges. Often people just tear the rubber layer off completely, leaving a bare steel bottom with holes in it and screw heads that don’t sit flush with the surface.

Apple-MacBook-White-mid-2010-bare-bottom
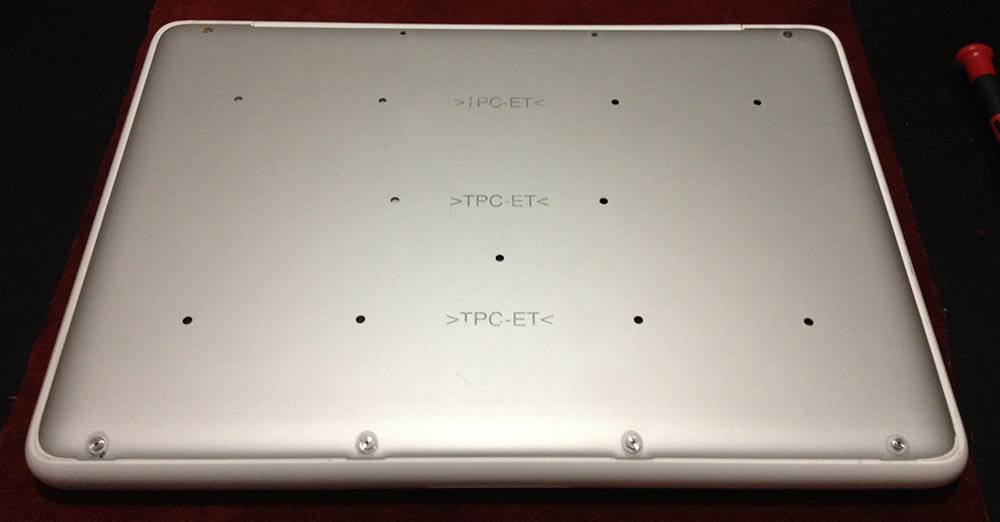
To Apple’s credit, somewhere along the line they started offering to replace this bottom piece for free with their MacBook Bottom Case Replacement Program. But it doesn’t seem like many plastic unibody MacBook owners were notified about this. If you own one of these, call Apple. They might still replace your bottom case depending on when your MacBook was originally purchased. But the one I recently bought (USED!) missed the cut-off date by a month or so. Apple said they would sell me the bottom case piece for about $100 – a bit too much for a 5-year-old laptop in my humble opinion.

There are people selling new bottom cases on Amazon and elsewhere for much better prices. I tried to buy one but it never arrived. I am currently awaiting a refund, but the seller is not responding to my messages.

Which is why I had to get creative.

Finding a New Covering for MacBook Bottom Case

Turns out that replacing the faulty rubber covering on your plastic unibody MacBook’s “bottom case” isn’t that difficult. A few months ago I helped a friend buy one of these and I used packing tape to attach a cut-to-fit piece of 5/16-inch-thick masonite to its bottom case. I did pretty clean work and the masonite protected the user’s lap from the high heat generated by the MacBook and the packing tape covered up the screw heads that could get caught on clothes or scrape the finish off of your table top. But it looked … a bit low rent, to say the least.

More recently I purchased another one of these for a family member. That’s where me ordering a new bottom case from Amazon comes into play.

But out of this frustration with a failed purchase and a faulty product design came a brilliant new, better-than-tape-and-masonite solution: use the upholstery off of an old couch as a replacement for the original rubber covering!

I simply cut a piece of upholstery from the dump-destined old couch, bought some E-6000 Craft Adhesive, detached the bottom case from the MacBook and spent way too much time patiently fitting and adhering the upholstery onto the bottom case.

I used a 1/4-inch margin to wrap over the edge of the bottom case, ensuring a nice, rounded edge. With a flat scraper razor I removed the soft, fuzzy threads from that wrap-over margin to make sure the newly-covered bottom case fit as tightly onto the MacBook as possible. Those little screws are not even an 1/8-inch long, so there wasn’t much room for additional spacing.

The final result is thick enough on the outside that the screw heads are now more or less flush with the upholstery material. It also provides a cushioned bottom for the laptop, similar to the original rubber material.

It’s frugal. It’s functional. It looks friggin’ awesome.

Gnome 3 Shell and Gratuitous Jupiter Notifications

I’ve been mostly enjoying running Ubuntu 12.10 with Gnome 3 Shell on my ThinkPad T530. The essential Gnome Shell Extensions were available pretty quick after 12.10’s release and Gnome 3 continues to get better and more polished. I even think the new Nautilus is pretty great. Much faster than the old Nautilus even though it’s missing some awesome features that had been recently introduced to the old version.

However, I like to install the Jupiter Applet to (I believe) improve my laptop’s battery life. And that applet has been flooding my Gnome Shell notifications panel with little lightning bolt notification icons. A new one is added every suspend/resume-from-suspend cycle. How to fix this? Is it possible to tell Jupiter to tell me less?

Ask Ubuntu To the Rescue

Today I found a fix for this problem. I’m making a post here in case an update erases my changes and I have to do it again. But this specific answer to the question “How do I clear all Gnome Shell notifications?” by user jtaillon does exactly what I wanted: Tells Jupiter to take it easy on the notifications.

The special text that needs to be added is this:

--hint int:transient:1

Here’s how to open the right file with sudo: Open a terminal and copy/paste the following and hit ENTER.

sudo gedit /usr/lib/jupiter/scripts/notify

Before proceeding, select all, copy and paste this file’s contents into a backup text file somewhere. Just in case you make a mistake.

Now compare the following example to your own file and add “–hint int:transient:1” as needed – should be 3 places where that is needed. You should be able to leave alone any other variations between my example and your file.

function notify {
  if [ ! "$NO_NOTIFY" = "1" ]; then
    ICON=$2
    MESSAGE=$1
    if [ "$DISTRIB_RELEASE" = "9.10" ]; then
      DISPLAY=:0.0 notify-send --hint int:transient:1 -i $ICON -t 1500 "$MESSAGE" 2>/dev/null
    else
      USER=$(who | sed -n '/ (:0[\.0]*)$\| :0 /{s/ .*//p;q}')
      USERCNT=$(who | wc -l)
      if [ ! "$(whoami)" = "$USER" ]; then
        if [ ! "$USERCNT" -lt 1 ]; then
          su $USER -l -c "DISPLAY=:0.0 notify-send --hint int:transient:1 -i $ICON -t 700 \"$MESSAGE\" 2>/dev/null"
        fi
      else
        if [ ! "$USERCNT" -lt 1 ]; then
          notify-send --hint int:transient:1 -i $ICON -t 700 "$MESSAGE" 2>/dev/null
        fi
      fi
    fi
  fi
}

Save and close the file once you’ve made the changes.

In my experience you should see the result of the change immediately without restarting your system. Now at most I see one single notification from Jupiter at a time and it disappears a few minutes after I resume-from-suspend.

I hope you find this helpful.

Ubuntu Linux with Gnome Shell on Lenovo ThinkPad T530

I recently purchased a Lenovo ThinkPad T530 with the following specs:

  • 15.6″ FHD screen with 1920 x 1080 pixel dimensions (13.5 x 7.75″ physical dimensions)
  • Intel Core i5-3210M CPU @ 2.50GHz
  • Intel HD 4000 Graphics
  • 4 GB RAM (Max is 16 GB!) PC3-12800 DDR3
  • 120 GB SSD
  • Intel Centrino WL-N 2200 (dual-band wifi)
  • 9 cell battery (with WIFI on and dim screen I get about 8+ hours!)
  • Minutiae: backlit keyboard, bluetooth, HD webcam, 90W AC adapter, DVD-R optical drive, 320 GB 7200 HD with Windows 7 installed, I ordered a mini-displayport to HDMI adapter for $5 from Amazon

Though the machine feels pretty light for its size, it is a predictably durable-feeling machine. Very sturdy and the matte black finish is really great. The thing looks awesome once you get all of the stickers off of the palm rest. With the lid closed, the rigid body is comfortable to carry around. A considerable improvement over the squishy Lenovo Essential B570 that it replaced.

As many online reviews have stated, the battery doesn’t seem to latch into the main body in a very satisfying way. When holding the laptop you will notice a bit of play between the battery and laptop body. Not a show stopper by any means. The display hinges are very firm. The screen latches work well but don’t hold the screen as tight as I’d like. Also not a show stopper. Just picking nits.

The new island-style keyboard is just as good or better than the previous ThinkPad keyboard (I had a T42 once upon a time). It looks similar to the keyboard on the Lenovo IdeaPad and Essential laptops, but it feels much more firm and durable – a delightful surprise. I was perfectly happy with the feel of the B570 keyboard, but this ThinkPad keyboard is really awesome. One thing that will take some getting used to is the placement of the FUNCTION and CONTROL keys on the bottom-left of the keyboard. You can flip-flop which is which from the T530 BIOS and I did that which is great. Unfortunately they didn’t make the two keys the exact same size so that you could physically switch the keys to match the BIOS setting. But that’s a pretty nerdy problem to have (#nerdworldproblems).

Since I don’t use Windows, I removed the original HD and put it in a box where it will stay until the day I need to resell the T530. That way a fresh install of Windows 7 will be ready for the new owner, since nobody seems to include actual Windows install discs with these machines anymore. Turns out Lenovo is migrating to the newer 6mm HD form factor. There’s plenty of room for a 9mm drive but my 9mm SSD didn’t fit the rubber sleds that came with the machine. I ordered a 9mm sled from Amazon and installed the SSD without the sleds until that arrived.

Everything works with Ubuntu Linux 12.04. Special buttons for audio volume, screen brightness, play/pause/next/prev, the physical WIFI switch, the touchpad, the trackpoint, all of it. I highly recommend the Intel Centrino WL-N 2200 wifi upgrade. The dual-channel/radio feature (?) is a massive improvement for working over WIFI as opposed to just browsing the web. File transfers across my local network are nice and snappy. Plus there are Linux drivers for it, so no need for “restricted drivers”. It just works.

Contrary to some of the reviews, the speakers are nice though don’t have a lot of bass – is that really surprising though? Sometimes these laptop reviewers… I just don’t know what audience they are talking to. They don’t seem to be focused on what is important to me very often. The number of reviewers that think the Thinkpad hardware design is outdated and ugly are in the majority. They apparently like shiny hardware enough that they can overlook the idiocy of putting a too-small right-SHIFT key next to the UP key.

Linux on the T530 with 15″ FHD Screen

My existing Ubuntu Linux 12.04 system on the SSD had no trouble booting up on the T530. Everything was perfect if you didn’t mind really, really small text and interface elements. Also, the colors are all pretty saturated on this screen. It needs to be calibrated and if you are a graphic designer your tools need to support color management. Luckily, Gnome/Linux, Gimp, Inkscape, Scribus and Firefox all have some pretty good color management features. They are not always completely finished features, but serious work can be done if you know what you are trying to do. If thinking about color management makes your head spin, buy a Mac running OSX and buy Adobe’s Creative Suite.

This screen has an effective screen resolution of 142 PPI. Compare this to the ~210 PPI on the Retina MacBook Pro. And then compare it to the ~100 PPI of most 13/14/15″ laptop displays with 1366 pixels across. In a nut: if you can get your operating system to increase UI text and graphic sizes to the physical size you are used to working with on a 15″ screen you will have the luxury of a very sharp, high-resolution experience. I’ve been able to do just that for the most part, though it is a work in progress. The rest of this post will be a notebook of adjustments and tweaks that I’ve used to make the high resolution experience consistent throughout my Linux system on the T530.

Notes on T530 Linux Configuration

Gnome Text Scaling

Adjust Gnome 3 text scaling to get the Gnome interface to use more appropriately sized text. You will need to install the Gnome Tweak application for this.

Advanced Settings/Gnome Tweak (gnometweak) > Fonts (see screenshot for my settings)

Web Browsers: Default Zoom Value

Adjust web browsers to zoom websites to a default value.

  • Firefox: enter about:config in address bar, search for layout.css.devPixelsPerPx and set the value to your preference. I used 1.5.
  • Chrome/Chromium: Settings > Under the Hood > Web Content > Page zoom: > 150%
  • Opera: Settings > Preferences > Webpages > Page zoom > 150
  • Gnome Web Browser: Not a setting that is available as of version 3.4.1

This also works for Thunderbird! Preferences > Advanced > Config Editor … > search for layout.css.devPixelsPerPx and set to 1.5.

In general, browsing the web like this is a very good experience. Sure, the graphic images are being scaled up in many cases right now, but a lot of responsive sites actually look beautiful and in general everything that is text or drawn with CSS looks gorgeous. Most importantly, the way zooming in browsers works across all contemporary browsers preserves the layout and design of most sites.

Screen Calibration and Color Management

If you are running Ubuntu 12.04 or newer or any Linux with Gnome 3 a program that manages color management and screen calibration should already be installed. Go to System Settings > Color. From this application you can specify color profiles for your various devices: screen, printers, video cameras, any thing that records or displays visual color data can be calibrated and color managed.

The T530 and W530 can be equipped with a built-in display colorimeter. Which is a neat and unique idea, but the device is built in to the palmrest and so will only ever be able to monitor one specific spot on the screen. That and I’m sure the included Windows software does some special maneuvers to work while the laptop’s lid is closed… I figured that probably wouldn’t work under Linux so I didn’t buy it. Plus, I already own a Pantone Huey Pro. Either way, you’ll need some kind of colorimeter to calibrate your screen. If you don’t already own one, I recommend the Hughski ColorHug colorimeter by Richard Hughes, the guy that wrote the color management application for Gnome on Linux (there’s a version for KDE as well). Looks like a great device at a reasonable price.

Firefox Color Management

Even after calibrating my display this FHD screen shows pretty saturated colors in places. The Gnome colord calibration certainly improves the overall color of the screen, especially the white and black points. However, the applications you use also need to be color managed for the best possible experience. This screen seems to have a tendency to over saturate, making the lack of true color management very obvious to a designer like myself.

Fortunately Firefox has some great color management tools built in to the more recent versions. Unfortunately there is a certain amount of overhead involved in correcting colors, so Firefox comes preconfigured to only color manage images that include a color profile. You want to switch it to color manage everything. This can be done via the about:config method, but there’s a nice and simple addon that makes the setting more approachable: Firefox Addon: Color Management

Once its installed go to Tools > Addons > Color Management and set it to “All Images” and then identify your current display profile by using the “browse” feature to navigate to it. You should start seeing a better looking web right away!

Read more about color management in web browsers here: Gary G. Ballard’s Web Browser Color Management Tutorial (note that Firefox does color management the right way: color managing images as well as colors defined in CSS.) Gary G. Ballard is awesome.

Caps Lock / Num Lock Indication

The T530 does not have an LED light that indicates the state of Caps Lock or Num Lock. It’s an odd exclusion since there’s plenty of room next to the WIFI and HD activity lights. But OH WELL, there’s a Gnome Shell Extension called “Lock Keys” that adds a nice and simple indicator in the top panel.

Mouse Cursor Size

Struggling with this a bit right now. I am getting inconsistent results and so am hesitant to even share the tweaks that I’ve made so far. I hope to report back on this with a really good solution. The current state of adjustable mouse cursor sizes on Gnome 3 on Ubuntu 12.04 appears to be a bit of a hacked up mess.

Lenovo B570: Ruined by Keyboard Layout

Look at this thing:

It’s an awesome laptop. Especially for the money. I bought mine off of Lenovo’s Refurb/Outlet store for a bit over $400. With a Core i3 processor, 4 GB of RAM, SD card reader, DVD/CD Write/Read, big touchpad with two-finger scrolling, a decent 15″ display, lots of USB ports, HDMI port and a full number pad on the keyboard, this is a great machine.

The build quality is good. It’s at its worst when it’s folded up and you’re carrying it around. There’s a lot of flex in the screen and it feels pretty chintzy. But when it’s open and running, the keyboard keys are very responsive and the keyboard is very firm itself.

There’s just one problem: they cheated the right-shift key by squashing full-sized arrow keys into the rectangular outline of the keyboard.

This serious problem is easy to overlook when you are shopping, ogling all of the goodies mentioned above at such an amazing price. Unfortunately, if you are a touch-typist the last key you want to press while touch-typing – and not looking at your screen or fingers – is the UP arrow key. And due to the idiocy of this damned cheapskate tradeoff I spend way too much time considering the purchase of a Thinkpad – which all have a similarly great keyboard but with a non-compromised right shift key – to replace it with. Every time I have to type anything longer than a few words I am sending the cursor up, up and constantly not where I want it to be.

I bet this machine could have been made for the same price with arrow keys in the style of the Thinkpad keyboards. Is Lenovo intentionally doing this to push certain people into buying a Thinkpad instead of one of these Essential-line and IdeaPad machines?

Also, it runs Linux like a dream. Everything but the fingerprint reader is working. Though I do wish it had dedicated volume and brightness keys.

David H. Freedman’s Ridiculous Steve Jobs Editorial

I have been casually (sometimes painfully) reading through Discover magazines year-end issue featuring “100 Top Stories of 2011”. I read magazines in an illogical order, so it has taken a while for me to get to Top Story #8: “The Man Who Gave Us Less For More” by David H. Freeman. I’ve probably read Mr. Freedman’s work before, but I’m not overtly familiar with him. Regardless, if the top story from 2011 is referring to Steve Jobs’s death, the title alone is a pretty insulting way to reference it.

Read it for yourself, but here are some of the main points of this ridiculous rant that attempts to make Steve Jobs look like a man that sells snake oil:

Original Macintosh

“What did this pretty beige box offer that a hundred other computers didn’t already offer, besides a higher price, much less choice in software and no compatibility with the rest of the world’s devices?”

Well, for starters, it had the first really successful, useful, graphical user interface powered by a mouse. This change in UI was so good and apparently successful that Microsoft made a really bad copy of it. I’m sure in your list of features and bang-for-buck you aren’t giving this important accomplishment much value. I just don’t see how, as an honest technology journalist, you can brush off the Macintosh as overpriced crap. Are you still working sans mouse today?

Apple Lisa

“Who remembers the Apple Lisa, a chunky desktop that sold for $9,995 in1983?”

OK. So the Lisa was a financial failure and a technological dead end thanks to the success of the Macintosh (see above). The price? Well, nobody put a gun to your head. Besides, Steve Jobs was kicked off of the Lisa team and as a result worked on the Macintosh. (see above)

Apple Newton

“Who remembers the Newton, a $700 PDA/paperweight?”

Try doing some research. You are conflating Steve Jobs with Apple. Steve Jobs left Apple in 1985. The Newton project was started in 1987. One of the first things Jobs did after becoming the Apple CEO in 1997 was kill the Newton.

NeXT

“Then there was the NeXT computer, to which Jobs devoted a decade of his life … starting at $6,500, Jobs sold only 50,000 units ever.”

Yes, the NeXT computers never sold well, but you make it sound like Jobs wasted a decade of his life on a complete failure. Maybe you didn’t know this – again, research – but the NeXT operating system was more highly regarded than the hardware. So much so that, when Apple was circling the drain after failing to build their own next-gen operating system, they purchased NeXT. This purchase is how Steve Jobs returned to Apple and also how Apple ended up with the operating system that it runs today. Without Steve Jobs’s return and that operating system – now called OSX – Apple wouldn’t exist today.

iPod

At this point you actually start giving Steve credit for creating something useful. But you still go on to piss and moan about paying higher prices for prettier things like Apple products have no real value above the competition. Never mind that you say this at a time when the rest of the consumer computer companies are struggling to build iPad and MacBook Air knock-offs at the same price point as Apple.

Discover magazine should be ashamed of themselves for publishing this misguided, lazy and factually incorrect editorial as though it were objective journalism. It makes me question everything else I read in their magazine.

HP LaserJet CP1525nw and Linux

Just bought a new HP LaserJet CP1525nw color laser printer for my home office. My wife and I have been making due for many years with an ancient HP inkjet printer that I had got second hand. Went it comes to needing something nice printed we relied on going to Kinkos or wherever. However, even small jobs end up taking more than 30 minutes at those places, so I finally decided that we needed to upgrade. And I wanted a laser printer because of the output quality and the more-practical toner cartridges as opposed to the unreliable and low-output ink cartridges.

You have to be a bit more selective when shopping for a printer when you are running Linux. But HP provides good drivers for their printers on Linux, so I looked at their offerings and found a too-good-to-be-true color pinter priced at $200 on sale at a local office supply store. I had originally planned on getting a black-only laser printer to avoid the high-cost of color laser printers, but prices have come down considerable since I last looked a few years ago. And the concept of a small printer that is network-ready is altogether new to me, but a great feature and one that lends printers to be more and more independent of any given operating system.

The HP LaserJet CP1525nw has turned out to be a very good choice for any home/office set up, but especially one running Linux. The HP packaging certainly doesn’t make it apparent that this machine will work with Linux, but it does just fine. Below I will provide a few pointers on getting this printer up and running on your home network.

The minimal printed documentation that comes with the printer is a joke. It basically instructs you how to plug your printer into the wall, then to your computer or router and then, with an illustration, how to put the provided CD/DVD into your computer’s optical drive. It’s ridiculous. No surprise the software auto-setup is only provided for Windows and Mac OSX. Fortunately, the setup is completely unnecessary.

The No-Bullshit Way To Setup Your HP CP1525nw For Wireless Printing

  1. Unpack the printer, remove the tape and stuff and plug it into a power outlet. Check the built-in LCD monitor and wait for the printer to complete its self-setup.
  2. Connect the printer to your router via ethernet cable.
  3. At this point you might need to navigate via the LCD and printer buttons to the Network setup. It’s a simple menu tree that you navigate via clicking the arrow buttons and clicking OK. Just connect via Ethernet and use DHCP. It should connect itself to your network.
  4. Once the printer connects to your network it will display its IP address on the printer’s built-in LCD screen.
  5. Enter that IP address into a web browser on a computer that is on the same network. After you click enter you will be presented with a web-based administration interface for your printer.

  6. Click on the “Networking” tab.
  7. Click on “Wireless Configuration” on the left-hand options.
  8. Status should be “ON”
    Configuration Method should be “Join an existing network”.
    Network Name should present a list of available networks. Click on yours.
    Authentication should be set according to your network
  9. Click APPLY and disconnect the wired connection to the router. The little wireless light on the front of the printer will start blinking as it connects to your router wirelessly. Once the light is solid the printer’s new IP address should be displayed on the built-in LCD display.
  10. On your computer try adding the network-available printer. There is lots of documentation out there to do this for the most popular Linux distributions. I won’t repeat those instructions here. The HP Linux driver that’s currently available does not specifically include support for this model, but just look for the latest HP CP15XX model number and it will work fine.

That should be it. You should be able to run test prints and confirm that your printing settings are all correct. Hopefully this is helpful.

Addendum

If you like to pinch pennies like me, you probably turn off your printer when it’s sitting idle for long periods of time. I discovered that, using the DHCP mode, sometimes the printer would get a different IP address. This might not be a problem for some networks, but for me it would cause my Ubuntu desktops to automatically add a new printer at that different IP address.

To resolve this issue all you have to do is:

  1. Set a Fixed IP Address
    If you know that your two or five computers on the network are relatively low in the IP range, pick an IP address for the printer that will most likely not interfere with other systems. Something like 192.168.1.50 would probably work. Regardless, decide on a number for the printer.
  2. Configure the Printer’s IP Address
    From the on-printer LCD screen and simple navigation button, go to
    Network Setup > TCP/IP Config > Manual
    You can set the IP address with the left-right arrow and the OK button.

With that set up, your printer should be able to reconnect to the wireless network and every time you turn the printer off and on it will always have the same IP address.

Lenovo G530 Touchpad (Trackpad) Disabled

Recently my wife was using my Lenovo G530 (running Ubuntu Linux) in the living room and somehow managed to disable the trackpad. She could not recall pressing anything unusual. This particular laptop has a little blue light that glows in between the two trackpad buttons with an icon indicating that the light means that the touchpad was disabled. Great, so the built-in feedback that the laptop had was working correctly, but how did we get the laptop in this state? At the time we had a friend over, so I just pulled out a spare mouse rather than attempt to solve the problem.

The next morning I expected that, upon restarting the laptop, the trackpad would be functioning correctly. There are many bugs in the computer world that can be resolved with a system restart. But that didn’t work this time. The touchpad continued to have no influence over the cursor on the screen.

I then proceeded to search the web for more information about this touchpad-disabling bug either associated to the Lenovo G530, to the particular version of Ubuntu that I was running or to a combination of the two. I found several listings but they mostly had to do with the touchpad being completely unavailable after a recent operating system install or upgrade. My touchpad had worked perfectly including horizontal and vertical scrolling until this recent change.

Well, after an hour or so of casually poking around the internet I discovered an important, but rarely noticed touch-sensitive button next to some touch-sensitive volume controls that I almost never use:

Sure enough, touching that quasi-button re-enabled the touchpad. My wife had apparently touched it accidentally when trying to increase the volume. All I could do was laugh at my stupidity. And be a bit delighted that Linux so completely supports the hardware on my laptop.

Just Started Running BOINC!

I’ve been running my Debian Linux (PowerMac G4 780 MHz) file server for almost a year now. Aside from a recent near-suffocation from cat hair it has had no problems. When we’re going to be out of town I shut it down, but otherwise it runs all the time. We haven’t really noticed the addition to our power bill and in the winter it just contributes to the in-home heating, so it’s not a big deal. Especially considering that I got this machine for little or nothing.

It’s pretty nice being able to jump from my desktop to my laptop without missing a beat when working on various projects or to listen to my entire music collection from anywhere in my home. It’s also very satisfying to have a weekly automated backup to a secondary drive for all of my files. I don’t have an off-site backup solution yet, but at least I’m prepared for hardware failure.

Better late than never, but I finally got around to setting up BOINC on this server.BOINC is “Open-source software for volunteer computing and grid computing.” Basically, it turns lots of individual computers into one effective super computer. The main goal behind this software is to allow individuals to help under-budgeted research projects by allowing them to use their idle computers to process computations.

Since my PowerMac G4 spends most of its time twiddling its thumbs I thought it would be good to give it something constructive to do. In this case I have set it to help with the Rosetta@Home project:

Rosetta@home needs your help to determine the 3-dimensional shapes of proteins in research that may ultimately lead to finding cures for some major human diseases. By running the Rosetta program on your computer while you don’t need it you will help us speed up and extend our research in ways we couldn’t possibly attempt without your help. You will also be helping our efforts at designing new proteins to fight diseases such as HIV, Malaria, Cancer, and Alzheimer’s.

It sounds like a pretty good thing to provide assistance to. I’ll report back once my server has actually completed some work and registered on the project’s meters.

On the Design of Laptops (and my new Lenovo G530 running Ubuntu Linux)

Over the last few months I’ve been shopping for a new/refurbished laptop. I had my mind set on a refurbished Thinkpad R61 or R500, but those were ranging between $600 and $700. At that price I was going to have to wait a while until I had more money set aside. In the meantime I have been looking at every laptop I come across just in case there’s something awesome out there that I have not yet seen.

Earlier this week I was at Best Buy for an unrelated computer project and, on my way out, I swung through the laptop section. After looking everything over it was apparent that anything that was under $500 was crap. However, NONE of the machines were very appealing to me. I know that for a computer I should just be concerned with the performance aspects, but I can’t help but be extremely interested in the overall design of the hardware.

Looking at all of those laptops was disappointing in that aspect. But for Apple and Lenovo, all of the computer manufacturers have apparently decided that all computers must look like some kind of pimped-out Honda Accord. All of them are very glossy plastic and generally covered in distracting ‘designer’ details. The new Dell Studio line is an improvement, but I was underwhelmed by the ‘feel’ of those devices. They felt cheap and bulky and were all priced at the high end. The Sonys look a little better, but not much and they are WAY over priced.

None of these machines resembled the regal designs of Apple or Thinkpad laptops. I know Thinkpads are often considered ugly and bland, but I don’t agree with that. The T-series especially are always very thin with hinges, buttons and levers that intuitively make sense. And the cases always feel very serious and rugged. The Thinkpad is actually better than any Apple laptop in my opinion since it doesn’t allow aesthetics to override functionality. There are plenty of buttons next to the trackpads. The display-latch is not some thin little button that you have to push with your fingernail (Titanium Powerbook).The arrow keys are not scaled down to fit into the overall rectangle of the keyboard.

Speaking of screwed up keyboards, just used a friend’s Dell-AlienWare laptop last night… why would a gamer or anyone that would spend that much money on a laptop want a keyboard that is compromised in any way? For example, the laptop was a 17″ display version with a full number pad but for some reason important keys like the arrow keys, the right-shift key and the question mark/slash key were all micro-sized to fit into a rectangular keyboard outline. It made the keyboard almost unusable. I kept hitting the Shift key instead of the slash-key while typing in URLs. Why would you do that to a premium laptop keyboard? These hardware designers have obviously lost touch with reality. Or maybe gamers really don’t use their computers for anything other than gaming.

After all of this frustration I ended up finding a good laptop at the unbelievable price of $378 on NewEgg.com’s daily specials. I did some quick research and decided to go with it as a compromise to save some money. When the machine arrived two days later I was mostly delighted. What’s the machine? A Lenovo G530. Never heard of it? Neither had I.

Lenoro G530

Apparently Lenovo’s Value Line isn’t very heavily promoted. Also, if you go to their site, the price isn’t much different from their IdeaPad line. The price on NewEgg was pretty spectacular. I knowingly made some compromises, but overall I’m very happy with this new laptop, how it runs and how it looks.

Once you carefully peal off the ‘Intel Dual Pentium Inside’ and ‘Built for Windows Vista’ decals the machine is all black with some subtle gray print and a few blue lights. The only real design misstep is the oversized Lenovo logo on the outside cover. It could have been half the size or maybe even a third. And it’s some kind of metal decal that’s inset into the cover, so you would probably do more  damage than good trying to remove it. Here’s a short list of gripes:

  • The display would be better if it had a latch that held it closed.
  • The oversized exterior Lenovo logo
  • It’s thicker than my Thinkpad T42
  • The exterior cover is a smooth black that shows finger smudges.
  • They could have saved time and forgotten about the touch-sensitive buttons.
  • A middle-button with the trackpad would have been nice.
  • Display is glossy

Here’s a list of nice features:

  • Very quiet
  • Very cool to touch even after long hours of use
  • Touchpad is as good and sensitive as a Thinkpad’s
  • Display is big, sharp and bright
  • Keyboard is great
  • Runs Ubuntu Linux as though it were its intended OS
  • Wireless turn-off switch is handy
  • Exterior looks great
  • Handling/moving laptop build feels strong and well-built
  • Video playback is excellent

And here are the specs:

  • Pentium Dual-Core T4200 — 2 GHz
  • 2 GB of RAM
  • 15″ display — 1280 x 800
  • 150 GB Hard Drive
  • DVD-RW Optical Drive
  • Built-in Webcam
  • Built-in a/b/g Wireless
  • 4 USB ports
  • VGA-out port
  • Ethernet port
  • Modem port
  • Multi-Card Reader
  • Line In jack
  • Headphone jack

This is a good system and great for running Linux. Some of the hardware needs proprietary drivers (wireless) but with Ubuntu getting drivers like that is fairly simple. A great budget machine that, in my opinion, is much better looking and less bulky than most of the ]more expensive models that are on the market currently. If you can find it at the price I got, this is an amazing machine compared to the much smaller and less powerful netbooks that are similarly priced.

Enhance Your Apple Trackpad with Raging Menace’s SideTrack

Several years ago I bought an old PowerBook G3 Lombard in pieces, put it together and installed OSX 10.3. It worked surprisingly well and was good enough for email, web and other basic stuff. However, one of the biggest disappointments was how ‘dumb’ the trackpad software was. That was the first time I discovered Raging Menace and two pieces of software that they make that are completely awesome: MenuMeters and SideTrack. Last week I acquired a PowerBook G4 550 MHz laptop and remembered how necessary SideTrack was. Without it the laptop was painful to use without carrying a mouse around at all times. It makes these old trackpads just about as useful or maybe even more useful than the new multi-touch trackpads that Apple has introduced. I like this software so much that I am taking the time to introduce more people to it.

MenuMeters

Raging Menace: MenuMeters for OSXI know this is a post about enhancing Apple trackpads, but first a quick note about MenuMeters. If you’re familiar with Linux you’re probably used to having a nifty system resources ‘gauge’ that provides live information about processor activity, RAM use, network activity and more. OSX comes with an application called ‘Activity Monitor’ but it’s a resource hog and doesn’t provide a simple interface that can be visible at all times.

MenuMeters adds this feature to OSX by making this data available in the main menu bar next to your wireless network status and volume control. It takes very little resources. I don’t know exactly how little, but if you can run it on a PowerBook G3 running OSX 10.3 while being able to do OTHER things, it apparently isn’t using very many resources. It’s so excellent that it should come with OSX pre-installed. The good news? Raging Menace offers MenuMeters as a free download.

SideTrack

RM_SideTrackThis little bit of software is just as valuable and unassuming. SideTrack opens up that simple, one-purpose Apple trackpad and turns it into a powerful, multi-purpose device. Suddenly your trackpad is endowed with vertical scroll, horizontal scroll, the ability to set each corner of the trackpad to evoke a custom key command and more.

SideTrack isn’t free, but you can try it out for free and, if you find it useful, purchase a license for $15. Totally worth every penny. It’s definitely easiest to understand its many features by just downloading and installing it. However, these screenshots of the preference panes will tell you a lot.

Check out these excellent pieces of software at ragingmenace.com. You won’t regret it.

Dell XPS 420 with Linux Review

Dell XPS 420Well, it’s not perfect. I think my big mistake was not going with the more expensive NVIDIA video card. Actually, I’m fairly certain that any problems I am having have everything to do with the video card: ATI Radeon HD 2400. On the whole it’s exactly as advertised. Following are some things that I feel are important features.

Packaging

I was disappointed that the box for this beast was so big. I’ve seen the recent Mac Pro tower boxes and they are not much bigger than the machine itself. The XPS 420 box is HUGE. This does mean that the machine arrived in pristine condition though.

Dell is definitely close to Apple in presentation with the XPS systems. Here’s what came with the machine:

  • 1″ thick User Manual
  • Small quick start manual
  • Very nice noise-canceling ear bud headphones
  • Velcro straps to help you keep your many wires and cables under control
  • Dust Towel for the everyday necessity of wiping the dust off the glossy black finish
  • Faux-leather XPS-stuff collection book-ish thing to hold this stuff
  • Dell Multi-media keyboard (extra $25 I think) It’s very nice
  • Dell 2-button mouse with scroll (I am using my trusty Logitech MX310 instead)
  • REAL WINDOWS VISTA INSTALL DISC (not a stupid ‘from recovery partition disc’)
  • ATI Driver disc, basic Dell software disc, Adobe Photoshop and Studio Elements, Microsoft Works

I also bought a $50 speaker set from them with these nice, small speaker panels to put on your desk and a 12″ box sub-woofer to put on the floor. Sounds great, but would rather just have the table speakers alone.

Fit and Finish

The XPS 420 seems well built and solid. Surprisingly, it’s just about as big as my G5. However, it weighs no where near as much. Also, this thing runs very quiet. Now I realize how loud the G5 was. I think I remember them advertising the G5 as a quiet machine, but maybe I’m crazy.

Dell XPS 420 tower tray
There’s a nifty rubber-bottomed tray on top of the tower that is an excellent fit for all of those gadgets that usually end up on top of your tower: Portable Media Player, Digital Camera, and I put my wireless router there as well. They also provide some thin slits to hide you USB cables that run from the devices to the much-appreciated SIX USB PORTS on the back of the XPS. I don’t think Apple would ever do this, but I love it.

Dell Multimedia Keyboard
The Dell keyboard feels good and the multimedia keyboard comes with an attachable palm rest. I highly recommend spending a little extra for this keyboard. The multimedia keys all work in Linux except for the ‘Volume Dial’ which apparently does not have a ‘button push’ input. If you Google it, somebody has written a script to handle the input, but I just remapped the big arrow keys on the left to control the main system volume instead. It’s nice to have keys specific for media player (next track, previous track, play/pause). There are a few additional buttons that can be used for pretty much anything. I was able to set the ‘Close Window’ button to ‘Eject’ the optical drive disc. My wife likes the Calculator button. Also, someone other than Apple has finally caught on to the idea of putting USB ports on the keyboard. That’s excellent.

GNU/Linux Experience

Thanks to the video card, installing Ubuntu wasn’t very slick. Eventually I used the Alternate install disc with the text-based installer and was sure to specify only my optimal screen resolution, a few smaller resolutions and nothing larger than what I planned to use. Once I figured that out everything went fine after installing Envy and getting the direct ATI video driver.

Everything works aside from things related to the video card. What doesn’t work?

  • Fast User Switching: I get a black screen and Ctrl+Alt+Backspace doesn’t help
  • Hibernate and Sleep: Appears to go to sleep fine, but won’t wake up
  • Compiz Fusion with dual-display: It does work, but doesn’t feel stable and playing video suffers with it on

The only thing I use Compiz Fusion for is the Exposé-like window picker and I think the Alt-Tab app switcher in Compiz looks nicer and is larger. So, not a huge loss and I’m confident these issues can be resolved with improved driver offerings from ATI. Fast User Switching would have been nice also.

The ATI Catalyst Controller application for setting up the video card works well enough. Setting up a second monitor with a combined desktop space was simple. It’s seems a little out of wack though. I wouldn’t fiddle with it too much.

Performance

My system sports the Intel Core 2 Quad 2.4 GHz processor with 3 GB of RAM. This machine is fast fast fast. I’m pretty sure most of the speed comes from just one instance of the 2.4 GHz processors. The Quad proc does flex it’s muscles when exporting/converting/compressing video and audio. I don’t have numbers for you, but I was exporting some MP3 files from audio recordings I had made a while back with impressive results. I started the process on my 1.6 GHz 1 MB RAM G5 just to compare. The MP3 compression was at least twice as fast using the latest version of Audacity on both machines. And if you watch the processor activity graphs, the old G5 was peaking the whole time while the Core 2 Quad just hummed along on two of it’s four cores.

Running virtual machines with it is an excellent experience. As mentioned earlier, my wife likes to watch ABC shows online. I tried the Firefox-for-Windows-Over-Wine trick, but that’s not working right. Instead I set my wife up with a Windows XP VM using VirtualBox. I know VMWare is king in virtualization, but installing VMWare server, after agreeing to the legal mumbo-jumbo is a pain and apparently I can’t install VMWare Player via Synaptic on my system (I don’t get it). VirtualBox, because they offer a full open source version, is much easier to install. The performance is good too. I hear the big difference is in networking and that’s not really why I need a virtual server anyway. Regardless, my wife can enjoy a full-screen ABC.com HD video experience on my Linux system via Windows XP via VirtualBox. Fantastic!

Windows Vista

For starters, Windows Vista runs just fine on a VirtualBox VM with plenty of allotted RAM. However, now that I’ve had some time to look around, I find Vista to be very cluttered. The main menu has too much stuff displayed immediately and there’s so much crap on the initial desktop including the widgets that I felt claustrophobic. I can only imagine what a less savvy user would think on initial start. I’m confused. I thought they were trying to minimize menus and everything to focus on the average user with the capability to customize for an advanced user. They’re so inconsistent. Windows XP was actually looking good in my opinion. As a Mac user I felt a little threatened at the time. I think Vista may be a step back.

On the other hand, the install experience was a big improvement, but unfortunately most of their users won’t ever experience it. The loading and log in screens look great too. I’m starting to wonder if I should start fiddling with the Linux Gnome log in screen. Somebody, a designer, needs to step in and make it cool like what Windows Vista and Mac OSX offer. Currently the standard ‘enter username and password’ screens can look nice, but the ‘list of users with avatars’ screens look like crap on a stick.

Login Ubuntu Login CleanX
Login OSX Login Windows Vista
Login Linux Gnome User List

Complaints

  1. I can only wait for ATI to improve their Linux driver. Supposedly more ‘openness’ is coming down the pipe. Worst case scenario: I’ll buy another video card. However, it seems like the best open source video support goes to Intel’s integrated video hardware. Since ATI is owned by AMD and NVIDIA is owned by Intel I’m pretty sure Intel is sharing info about the integrated video because it’s their low-end hardware. Somebody tell me what a good 3D and dual-head capable video card is for Linux. It all looks bad outside of older hardware that has been reverse engineered.
  2. The black gloss looks great in photos but is a bitch to keep clean in the real world. Anybody that’s owned a black car knows that.
  3. Frickin’ Windows Sideshow display is completely worthless, even if I was running Windows.
  4. Too many wires and cables. I definitely appreciate why people pay a lot for an iMac.

Dell XPS 420 Lots of Wires

Overall

I’m very pleased with this system. It’s extremely nice and it’s a pleasure to finally use a high-powered machine with plenty of screen real estate to run my favorite open source graphics programs. I apologize for the long review (took WAY too long to finish) but there were a lot of relevant details. I hope this review is helpful for Linux users looking for new hardware especially.


Kodak C330: Apparent SD Card Size Limitation

Kodak C330

Yes, this camera is over two years old. However, we’ve been wanting to replace my wife’s 256 MB SD Card for some time now. With much appreciation, we received a shiny new Kodak-brand 2 GB SD Card for Christmas from her parents. Excellent.

I finally got around to trying it out today only to discover that the C330 camera reads the card as ‘Full’ and any attempt to format the SD Card (which I know to be completely empty) results in the statement ‘Filesys Error 0e0010’.

Fortunately I have another SD Card-based digital camera. It sees that the card is empty and says I can take 600+ pictures at some ridiculously high resolution. I even tried swapping my other camera’s 2 GB SD card with the new one with the same result.

My conclusion is that it’s the size of the card at fault. The 32 MB and 256 MB cards we have work just fine with the C330 while the two different 2 GB cards both have the same problem with this camera. This isn’t surprising coming from a fairly inexpensive camera, but still disappointing knowing that her parents could have spent a lot less money for a card that we could use.

My last gripe is that this apparent limitation isn’t listed in the specifications for the camera in the user manual or on the Kodak site. Perhaps the primary audience for this device is the type that just uses the card it comes with? Perhaps Kodak never imagined SD Cards getting so big! 😉

New Dell XPS 420: Linux Dream Machine?

One week before Christmas my beloved Thinkpad T42 started having motherboard problems. After a little looking around I found that the problem was common. I don’t know what the deal is exactly, but pressing on the keyboard or touchpad too hard causes the display to flicker and the system to freeze. As a bonus it will also freeze at completely random moments. No more reconditioned laptops for this kid.

So I just finished ordering my first Dell desktop. I have been looking around at the Circuit City, Gateway, NewEgg and System 76 sites. They all have great Core 2 Duo-based systems at good prices. I applaud what System 76 is doing selling Ubuntu pre-installed systems only. Unfortunately it looks like they can’t compete with the buying power of the much larger discount computer manufacturers. I can’t deny my financial situation. The price difference is just too great. I even looked at building my own machine with pieces from NewEgg, but after talking to a friend I swallowed my former-Apple-promoting pride and gave Dell a try.

First I looked at the Ubuntu Pre-installed systems that Dell offers. Much to my disappointment the offering is very limited and not high-powered. To me, I would think that Linux users are generally advanced computer users that buy fairly high-end systems. I’m sure they did a lot of market research to determine what systems to offer, but this looks like a misstep to me. Perhaps their target isn’t people that know how to install Linux on any machine. Perhaps their target audience are people looking for an inexpensive alternative to Windows. However, if that indeed is the goal why aren’t they selling the Linux systems along side the Windows systems?

I decided to just shop at the regular Dell store and install Ubuntu myself. From what I’ve read, there are Linux drivers for most of the hardware provided, albeit ‘restricted’ drivers provided by the manufacturer. I don’t have a problem with installing these drivers. I’m grateful that the manufacturers even bother to provide them. Also, the companies will respond to increased demand for their product. They won’t necessarily respond to an extremely small group of people bitching about their drivers being open source. That’s how I look at it.

I settled on the XPS 420 because of its price range and power. Here are my new machine’s specs:

  • Intel® Core 2 Q6600 Quad-Core (8MB L2 cache, 2.4GHz, 1066FSB)
  • 128MB ATI Radeon HD 2400 PRO
  • 3GB Dual Channel DDR2 SDRAM at 667MHz – 4 DIMMs
  • 320GB – 7200RPM, SATA 3.0Gb/s, 16MB Cache
  • CD/DVD Burning Optical Drive
  • External speakers with sub-woofer
  • FINAL PRICE: $974 (after $100 savings, before tax/shipping)

The video card is supposed to be capable of outputting to two displays. However, I am prepared to buy a second video card later if that doesn’t work under Linux. I know that my Apple G5’s video card doesn’t successfully accomplish dual-display under Linux even though it works fine under OSX. Maybe xrandr is more capable with this particular video card. I am very impressed with the potential of xrandr, especially after my S-Video Out setup from a few weeks ago.

I’m expecting this machine to be everything I could ask for in my own personal design/development system. It should be delivered before the end of the week, but with the New Years holiday it might be next week before I can get back to working in Linux. I will report on the outcome asap.

Homework assignment:
If anyone can explain exactly how many ‘cores’ are in the above listed processor, I’d love to know. Due to the 4-DIMM ram setup I am guessing the magic number is four. However, the title ‘Core 2 Quad Core’ is confusing. If a Core Duo has two cores, a Core 2 Duo has four cores, then a Core 2 Quad Core should have eight cores, right?

Watching Internet TV on My TV

Recently, due to our move and lack of willing to pay for a DVR with our cable subscription, my wife has introduced me to how the big networks are offering all their shows online. It’s great. Really.

Unfortunately, this means my wife has been sitting in our bedroom watching her favorite shows on a 19″ computer monitor hooked up to our Apple G5.

Solution: I found an RF modulator at Wal-Mart for $20 (RCA I think) that lets me hook my laptop’s S-Video output up to our old 30″ CRT. I wouldn’t write any letters on it or do lengthy reading, but video and images look pretty good. Using Linux certainly threw a few curve balls into an otherwise simple setup.

So, how can I too enjoy Internet TV on my old CRT Television?

Well, you are in luck, ‘cuz I did all the hunting around for you. At least if you are running Ubuntu Linux 7.10 on a Thinkpad T42.

Here’s how to use the xrandr tools to start your S-Video out:
mfbernardes.com: Finally I Got S-Video Working My Thinkpad T42
XStrikeForce: HowToRandR

I took Mr Bernardes’ terminal commands and created custom application shortcuts for each separate step that I use frequently:

  1. Activate S-Video
    xrandr --output S-video --set load_detection 1
  2. Start S-Video OUT
    xrandr --output S-video --auto
  3. Turn LCD OFF
    xrandr --output LVDS --off
  4. Turn LCD ON
    xrandr --output LVDS --auto

Then simply go to NBC.com, CBS.com or whatever. Hell, YouTube even.

Another good thing that helps position your video window on the TV for optimal viewing is the ZOOM capabilities of Compiz-Fusion. So look into that. You can get it set just right without too much visual noise around the video.

Wait a second, all my favorite shows are on ABC…

If you haven’t figured it out yet, ABC has a custom video player that is not available for Linux. That’s a deal breaker right there. Especially since that’s my wife’s favorite channel currently.

Luckily, the good folks over at WINE are doing a smash-up job. The trick is to install the Windows version of Firefox over WINE and then watch ABC from Firefox/Windows. Check out the following info for details:

JDESLIPPE

It’s a pretty clever solution. Not too many details there.

What about audio?

The RF Modulator that I bought has inputs for component audio that will then pass to your TV via COAX. I actually have a receiver stereo, so I push the audio through that from my laptop for the full experience.

That was simple!

I don’t guarantee this will work, but I wish you luck if you choose this challenge.

Logitech MX310 and Ubuntu

Logitech MX310 Button Map

I spent some time setting up my Logitech MX310 mouse to work with Ubuntu and Beryl. The Beryl Settings Manager provides an amazing amount of customization IF you can find what you are looking for. Beryl is making a lot of progress in the interface, but it’s a very complicated mechanism they’ve built and there really isn’t any way to simplify it. So you simply have to get your hands dirty. However, I am hoping this post can help you out. With a little help, your MX310 will be invoking Beryl’s Window Picker (a lot like Expose in OSX) with the click of a button.

First, you have to know which button is which. My little drawing on the right illustrates how my system sees the MX310 buttons. This may be different for you depending on your X configuration. I can’t recall customizing my setup, so I’m hoping I have a default configuration. Note that the very top button and the scroll-wheel-click register as the same button. 🙁

Second, you have to go to the Beryl Settings Manager. I would start with disabling a few default settings that simply have no purpose and only create confusion when they are accidently invoked: Window Opacity and Window Saturation. It’s cool what Beryl can do with these features to create feedback, but being able to see the window below my active window via transparency is perfectly worthless. Let’s get started:

  1. Open Beryl Settings Manager
  2. Go to:
    General Options/ Shortcuts/ Keyboard and Mouse/ General Options/ Bindings.

    Increase Opacity Disable
    Decrease Opacity Disable
    Increase Saturation Disable
    Decrease Saturation Disable
    Hide All Windows And Focus Desktop <Control>Button2
  3. Go to:
    General Options/ Shortcuts/ Keyboard and Mouse/ Scale/ Bindings.

    Initiate Window Picker for All Workspaces Button2
  4. Congratulations You’re Set!

Let me know if this was helpful or if you have discovered a different configuration.


Ubuntu 6.06 on 1.6 GHz PowerMac G5 (part 3)

The first thing to do with Ubuntu on a G5 is reconfigure the X server. By doing this you will be able to expand your allowed screen resolution from 1024 x 8XX to 12XX x 1024 or possibly 16XX x whatever. This was a big issue for me. 1024 is just not big enough.

When doing this make sure you know your G5’s video card and model (my 1.6 GHz G5 has nVidia GeForce FX5200). There are plenty of questions within the set up process where you will simply give the default answer because you don’t know what the hell they’re talking about. If the question sounds over your head, just relax and most likely there’ll be some helpful notes there for you. Open a terminal and enter the following to begin the set up:

sudo dpkg-reconfigure xserver-xorg

After that’s done it’s pretty much business as usual. There are a few sacrifices. The G5 is fast, but I think the video card isn’t being used to it’s potential by Linux. When the screen saver that looks a lot like the standard OSX colored-flare screen saver comes on, it seems to work the machine pretty hard. In fact, any of those more dynamic screen savers run a bit choppy. The G5 should have no problem with those things, but that’s truly the least of my concern.

The other issue is that of sitting at a Mac with a Mac keyboard but not being able to use the ‘Apple’ key like you used to. There is a lot of room for custom key commands, but Linux looks at the Apple-keys as two separate buttons rather than two buttons with the same function. So, the left key can be set up differently than the right key. It makes one wonder about the use of the control key. Well, the location of the control key anyway. The Apple key location makes so much more sense. It’s definitely more ergonomic.

For the record, I plan on reinstalling OSX and selling my G5. I want a Linux-only system and the G5 (with my limited Linux and programming capabilities) is just not the easiest machine to use. There is also the fact that I want a laptop, so my perspective might be distorted. My assessment is similar to others: If you have a Mac, run OSX. There are some things about OSX that I don’t like and there are some things about Linux that I like, want to learn more about and promote. The day the GIMP supports CMYK will be the nail in the coffin for me, but until then I’m going to try hard to make designing for print and the web in Linux work.

OSX: Mounting Digital Cameras, Getting and Deleting Pictures

Initially, these cameras were being used with a WindowsXP box. The camera would be connected via USB to the computer, it would mount as an external drive, the files would be copied to the computer’s hard drive, the files would be deleted from the camera drive and the camera would be unmounted and turned off. When the camera is used to take more photos the compact flash disc would be empty and ready for another shoot.

Well, our department changed a bit and the main photographers for the company were now two OSX users. It seemed like a waste of time to continue using the now vacant WindowsXP box just to pull the files off of the camera. I’m all about diminishing silly myths regarding OSX and its support for external hardware. “Puhshaw! Of COURSE it works with a Mac!”

So, we plugged in the camera and tried it out. Everything worked as expected. Once the files were transferred, we hit the ‘Delete’ button on the finder (or Command-Delete or dragged the files from the camera’s folder to the trash) and unmounted the camera and turned it off. Everything’s cool.

When the next shoot was began however, we realized everything wasn’t cool: the files from the previous shoot were still on the camera. Sort of. There were no existing images to browse through, but the available picture counter wasn’t showing its usually capacity. So, we plugged it back in to the Mac and to our surprise the folders on the camera showed that they had no contents. Where were these mysterious files? Well, an obvious clue if you noticed is that those files you thought you had deleted reappear in the Trash when you remount the camera.

To make a long story short, this is an excellent example of how OSX handles deleting files. It was a little frustrating, but after thinking about the process I realized that it’s really a great method for saving people from deleting the wrong file. Here’s how it works:

When you tell OSX to delete a file on any drive you’ll notice that the files are quickly removed (unless it’s a network drive. In that case, after telling OSX to delete the file you will be reminded that the files will be completely deleted and asked if that is indeed what you had intended.) This process is quick because the files are simply moved to a folder on the same drive named ‘.Trashes’. The specified trashes directory is hidden on every drive. Any file whose name starts with a ‘.’ will be hidden in OSX and all Linux OSes as well. This is a little confusing since anything you trash on any locally mounted drive shows up in the ‘Trash’ on your dock. The Trash would seem to be one location on the computer, but in reality the ‘Trash’ is a collective display of the contents of all .Trashes folders in all locally mounted drives. If you’d like to see these hidden files in Linux it’s usually an option under ‘View’ in the file browser. OSX’s Finder doesn’t have that option for the general user, but it’s easy enough through a simple command in the Terminal or the use of an AppleScript to run the Terminal for you. Anyway, here’s what you need to see hidden files in OSX.

This method works flawlessly as long as your mounted drives do not get moved or unmounted very often. You know that those files won’t be deleted until you remove them from the Trash. So, the secret to working with any digital camera or external drive is to move the old files to the Trash and be sure to empty the Trash before you unmount the camera or drive. That action will completely delete the files. No more mystery files on your camera.

Now, this brings up an issue with using OSX’s Trash as a holding place for files you are not quite ready to completely delete. If you want to delete files from your camera those files will be permanently deleted as well. To avoid interrupting this method of using OSX’s trash I create a folder inside my home folder and I name it ‘Not Quite Trash’. I then drag it to the dock and set it right above the ‘real’ Trash. This way you can still drag files to it just like the ‘real’ Trash. It’s not perfect, but it’s pretty good.

Finally, I have to say that OSX should probably ask the user about what to do with the contents of the Trash that are associated with any drive they are attempting to unmount. That would make the above post completely unnecessary. However, Xubuntu 6.06 doesn’t even have a trash mechanism. You just delete the file and it’s gone forever. Definitely getting some use out of my ‘Not Quite Trash’ folder on this system.

iPod as OSX/Windows/Linux USB drive

iPod MiniTake advantage of your iPod as a cross-operating system file transfer or backup usb drive. If you’ve read my ‘About’ page you know that I employ OSX and Ubuntu Linux at home and use WindowsXP at work as well. Having a usb drive to plug into all three of them is what makes using three different operating systems livable. Hopefully this short post can save you all of the time I spent reading on the net about this idea. In the end it was so simple I vowed to start my own site where I could give advice to other power users that don’t want to sell their soul to the tech-geek gods.

First: What is the operating system you use to alter the music/video content of your iPod? Windows or OSX? I use OSX. If you use Windows this is going to be very easy. In the iTunes preferences make sure your iPod is set to ‘use as external drive’ or whatever (sorry I don’t have the exact wording).

Second: Something to keep in mind is the file system that the two different operating systems employ:

  • Windows: FAT32 or NTFS
  • OSX: HFS+

When an iPod is first used on either operating system it is reformatted with either a 3-partition HFS+ file system or a 2-partition VFAT (which I can only assume is another name for FAT32 or some relative of FAT32) file system. (The iPod may technically not be reformatted depending on the format it is initially formatted in. The difference is irrelevant to the issue at hand.)

Linux uses its own file system (usually ‘ext3’). However, Linux has been working with Windows for a long time and apparently it has no trouble reading FAT32 file systems. The same goes for OSX because, let’s face it, when you’re 3% of the personal computer market you adapt to work with the competition. So, you guessed it, if you already use Windows to manage the content of your iPod you don’t have to do a thing. Just plug your iPod into either a Linux or OSX box and it will mount as a removable drive. With Linux this experience can vary depending on the version of the Linux Kernel being used as well as the distribution of Linux. With Fedora Core 4 I had to manually alter a text file to allow the system to mount the drive. However, with Ubuntu 5.1 usb drives mount automatically. (NOTE:If you think the word ‘terminal’ is usually associated with some sort of illness, I recommend installing Ubuntu.) In OSX you’ll see a generic usb drive icon instead of the iPod icon. That’s easily corrected with a simple trip to the ‘Get Info’ window of the iPod and copy/paste of the correct iPod icon.

Now, for those of you using OSX to manage your iPod content. You need to reformat your iPod for Windows. Don’t worry, you can still use your iPod with iTunes in OSX. I do it all the time. File transfers are a little slower with FAT32 (VFAT) but the benefits of going between operating systems outweighs the cost in file transfer speed. The other issue has to do with file name length and possibly a limited use of certain characters in file names. Seems like a small cost.

The trick is finding a Windows box to use for the reformatting. Find a friend with Windows and bring a $7 six-pack of beer with you.

Next, you’ll need to download the appropriate ‘iPod Updater’ for Windows from Apple.com. Try this page:

www.apple.com/ipod/download/

This will have to be installed on the Windows box. Then you’ll plug in your iPod and start the program to reformat your iPod. NOTE: Backup any music or files you have on the iPod prior to this step. Reformatting will erase the iPod’s drive and create a new file system. If you have music on the iPod that you don’t have on your computer, download this applescript to pull those songs off of your ipod 🙂

Import iPod Audio Files Applescript

Once that’s done you’re ready to go. The reformatting is easy. You will now be able to take files in between different operating systems.

Linksys router + ZyXEL DSL modem = suck

Linksys Router I was excited to finally upgrade to DSL from dial-up. Before I got home I went ahead and bought the Linksys WRT54GS. My laptop only has an 802.11b wireless card but I figured I’d be prepared for the future while I’m at it. I did some brief research and checked reviews of this particular model. I’d helped my girlfriend and her roomates set up their older 802.11b Linksys router and I liked the interface. So I went ahead and spent high dollar (approximately $90).

I got home and plugged it in between the DSL router and the old iMac in the office. Suddenly I no longer had internet on the iMac. I could, however, bring up the admin page for the router. For some reason the internet specifically wasn’t coming through. I spent some time fiddling with the ip addresses and later called my ISP for help and they suggested changing the default 192.168.1.1 ip address to 192.168.2.1 in order to avoid any conflict with the ip address of the DSL modem. I tried that with no success. At one point I was even able to bring up the admin page of the DSL router through the Linksys, but internet remained unavailable.

All of this could be due to a lack of knowledge on my part, but I don’t think a router should be this complicated for such an expected setup. I just wonder what someone less technically savvy would do in this situation. The Linksys is very Windows-specific. The setup CD included will walk you through setting it up apparently. The instructions say to just put the CD in and let it take care of itself. Unfortunately, this is strictly for Windows. There’s a pdf in there but it wasn’t much help. The older Linksys router that I mentioned above actually had a paper manual with some generally helpful information about ip troubleshooting and more.

In an attempt to better understand my situation I unpacked my slightly older D-Link router (not wireless) and plugged it into the same situation that the Linksys was in. I let the DHCP reconfigure itself on the router and the iMac and then I immediately had internet. Everything just worked. This did not include any setup whatsoever. It looked like different hardware might be the solution. The Linksys’s wireless worked great, I had a strong signal down in the basement and everything. Just the detail of actually getting internet to pass through the router didn’t work. I think this may be a unique problem having to do with the way the ZyXEL modem and Linksys router interact as unlikely as that would seem.

My hardware setup is unusual (original iMac running OSX 10.3.9 and an old laptop running Ubuntu 5.1), but TCP/IP and the wireless protocols are standards that are not proprietary, so that isn’t an issue as much as the tech-dorks at the stores would like to convince me otherwise. Fortunately Staples accepts returns and in my agitation I most likely told them more than they cared to know about my situation. Now I have a Belkin in my car that I hope will ‘just work’ (especially since it cost $50 less than the Linksys). I’ll update this comment with the outcome.