Bulk Convert .doc to .rtf in Apple’s macOS or OS X Finder

At work I am archiving a large, very old collection of Microsoft Word documents. Some of the files are actually even older WordPerfect files that I converted to .doc files several years ago.

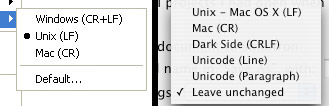
Yes, .doc is practically a standard, but I have come across several situations where these files get corrupted as they get moved from storage drive to server to other server. I find .rtf files to be much more resilient while also being an actual standard (or at least an open format that anything can read and write).

Reasons aside, I wanted a bulk script or tool for converting lots of .doc files to .rtf files. I couldn’t find what I was looking for* so I created my own solution: a macOS/OS X Services workflow that gives the Finder the power to convert any selected .doc files into .rtf files.

It looks like this in Automator:

Screen Shot 2016-06-27 at 7.21.44 PM

Here’s how to install this Convert .doc to .rtf workflow:

  1. In the Finder navigate to /Users/yourname/Library/Services/
    [if “Services” doesn’t exist, create a new folder and name it likewise]
  2. Download the Convert-DOC-to-RTF.zip, extract the contents onto your desktop (double-click in OSX)  and copy the file “Convert .doc to .rtf.workflow” to the previously mentioned “Services” folder.
  3. Open a Finder window with multiple files. Select all of the files. Right-click on the selected files. At the bottom of the contextual menu you will find an option titled “Convert .doc to .rtf”. (It may take a minute or two for this new option to become available on your contextual menu.)

This Looks Familiar

This solution and Services workflow is very similar to my Bulk File Rename workflow, which is now redundant because Apple finally used their previously unused features to provide a built-in bulk file rename functionality in Finder on versions of macOS/OS X 10.10 or newer.

*Though I didn’t find the complete solution to my needs, I did find the pieces of what I was looking for.

Mac Issues has a post about the OS X Terminal and the amazing commandline utility textutil that makes all of the above possible. How Apple manages to create amazing and powerful scripts and Automator features without using them to make macOS/OS X more amazing and powerful out of the box is baffling.

For Mac Eyes Only has a post about writing an Automator script to convert .docx files to .doc files. This gave me the missing “$@” variable that I needed to make my slightly different workflow actually work.

Export an Address Spreadsheet to Avery Labels with LibreOffice

This is meant to be a straightforward and clear description of the process of exporting a spreadsheet of contacts out to the proper format for pre-cut address label sheets using LibreOffice. Sometimes this process is called “mail merge”.

1. Create a Spreadsheet of Addresses

You may already have your spreadsheet ready to go, but I am trying to avoid making assumptions about whoever is reading this. You gotta have your information saved in a spreadsheet.

Generally, for mailing addresses in the USA, this involves using the first row of the spreadsheet to identify the column headers such as:

  • First Name
  • Last Name
  • Address 1
  • Address 2
  • City
  • State
  • Zipcode

You can even have additional columns for data that you might not be using on the labels – such as email addresses and phone numbers. You will be able to specify which fields of data will be included on the labels later in the process.

Save this spreadsheet in a location that is easy to find.

2. Tell LibreOffice That Your Spreadsheet is a Data Source

  1. With LibreOffice open, go to FILE > NEW > TEXT DOCUMENT
  2. With the new Text Document active, go to EDIT > EXCHANGE DATABASE…
  3. From the resulting “Exchange Databases” dialog window, click the BROWSE… button.
  4. Navigate to the spreadsheet of addresses that you just saved and click OPEN.
  5. Click CLOSE.

3. Create a Label Template

  1. With LibreOffice open, go to FILE > NEW > LABELS
    The resulting dialog window has 3 tabs/sections: Labels, Format, Options
  2. Under LABELS, set DATABASE to your  spreadsheet file.
  3. Under LABELS, set TABLE to your spreadsheet file or the specific table in your file.
  4. Under LABELS, set DATABASE FIELD to FIRST NAME and click the LEFT-POINTING ARROW BUTTON to place that field into the label template.
  5. Repeat STEP 4 with all desired DATABASE FIELDS.
  6. Under LABELS, set FORMAT to SHEET.
  7. Under LABELS, set BRAND to the brand of your pre-cut paper label stock.
  8. Under LABELS, set TYPE to the label type of your pre-cut paper label stock.
  9. Under FORMAT, do nothing.
  10. Under OPTIONS, set DISTRIBUTE to ENTIRE PAGE.
  11. Under OPTIONS, set SYNCHRONIZE CONTENTS to CHECKED.
  12. Click NEW DOCUMENT.

4. Customize Text Characteristics and Formatting of Label Template

  1. If you would like to change the typeface, font size or rearrange any of the data variables in your new label template, MAKE THE CHANGES TO THE TOP-LEFT LABEL ONLY.
  2. When you are done making changes, click the SYNCHRONIZE LABELS button in the SYNCHRONIZE palette-window. You should see all of the labels on the template update to match your changes.

5. Print Labels or Save Labels to New Document

  1. With the new Label Template Document open, go to FILE > PRINT.
  2. The resulting dialog window will ask “Your document contains address database fields. Do you want to print a form letter?” Click YES.

In the resulting MAIL MERGE dialog window:

  1. Under RECORDS select ALL.
  2. Under OUTPUT select PRINTER or FILE – I recommend FILE so that you can review the output and go back, make adjustments and repeat the previous steps without wasting paper.
  3. Click OK. Name and save the document in the usual way.

6. Congratulations, You Did It

Most likely you will have to repeat the process a few times to get everything just right. However, this should get you through the basic process. Let me know if anything needs to be more clearly described or explained.

White Unibody MacBook Bottom Case Fix: Upholstery

In 2009 Apple introduced a new polycarbonate unibody white MacBook to replace their older white MacBook body style. This new body was a plastic version of the aluminum unibody design earlier introduced in the MacBook Pro line.

Apple-MacBook-White-mid-2010Apart from being white plastic/polycarbonate, it looked more consistent with the MacBook Pro line and also got a one-big-button multi-touch trackpad, similar to the Pro models. It received a single hardware revision in 2010 before being phased out sometime in 2011 and replaced by the lower-cost 10-inch MacBook Air.

This is a great MacBook even in 2014/2015 and will run OS X 10.10 Yosemite just fine – especially if you replace its original hard drive with an SSD and have more than the introductory 2 GB of RAM.

However, the one catch for this MacBook body style is the rubber-covered bottom. I have yet to see one that doesn’t at least have some of the rubber layer being loose around the edges. Often people just tear the rubber layer off completely, leaving a bare steel bottom with holes in it and screw heads that don’t sit flush with the surface.

Apple-MacBook-White-mid-2010-bare-bottom
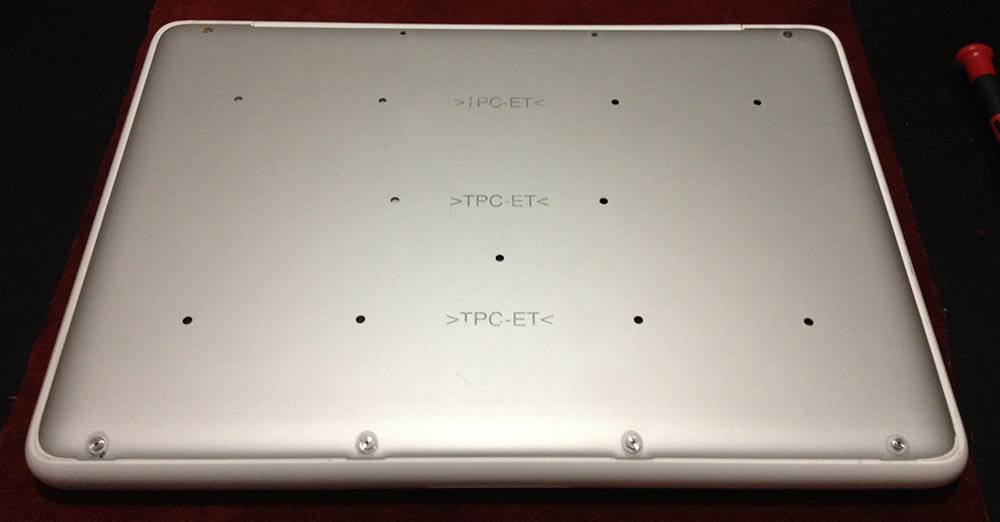
To Apple’s credit, somewhere along the line they started offering to replace this bottom piece for free with their MacBook Bottom Case Replacement Program. But it doesn’t seem like many plastic unibody MacBook owners were notified about this. If you own one of these, call Apple. They might still replace your bottom case depending on when your MacBook was originally purchased. But the one I recently bought (USED!) missed the cut-off date by a month or so. Apple said they would sell me the bottom case piece for about $100 – a bit too much for a 5-year-old laptop in my humble opinion.

There are people selling new bottom cases on Amazon and elsewhere for much better prices. I tried to buy one but it never arrived. I am currently awaiting a refund, but the seller is not responding to my messages.

Which is why I had to get creative.

Finding a New Covering for MacBook Bottom Case

Turns out that replacing the faulty rubber covering on your plastic unibody MacBook’s “bottom case” isn’t that difficult. A few months ago I helped a friend buy one of these and I used packing tape to attach a cut-to-fit piece of 5/16-inch-thick masonite to its bottom case. I did pretty clean work and the masonite protected the user’s lap from the high heat generated by the MacBook and the packing tape covered up the screw heads that could get caught on clothes or scrape the finish off of your table top. But it looked … a bit low rent, to say the least.

More recently I purchased another one of these for a family member. That’s where me ordering a new bottom case from Amazon comes into play.

But out of this frustration with a failed purchase and a faulty product design came a brilliant new, better-than-tape-and-masonite solution: use the upholstery off of an old couch as a replacement for the original rubber covering!

I simply cut a piece of upholstery from the dump-destined old couch, bought some E-6000 Craft Adhesive, detached the bottom case from the MacBook and spent way too much time patiently fitting and adhering the upholstery onto the bottom case.

I used a 1/4-inch margin to wrap over the edge of the bottom case, ensuring a nice, rounded edge. With a flat scraper razor I removed the soft, fuzzy threads from that wrap-over margin to make sure the newly-covered bottom case fit as tightly onto the MacBook as possible. Those little screws are not even an 1/8-inch long, so there wasn’t much room for additional spacing.

The final result is thick enough on the outside that the screw heads are now more or less flush with the upholstery material. It also provides a cushioned bottom for the laptop, similar to the original rubber material.

It’s frugal. It’s functional. It looks friggin’ awesome.

David H. Freedman’s Ridiculous Steve Jobs Editorial

I have been casually (sometimes painfully) reading through Discover magazines year-end issue featuring “100 Top Stories of 2011”. I read magazines in an illogical order, so it has taken a while for me to get to Top Story #8: “The Man Who Gave Us Less For More” by David H. Freeman. I’ve probably read Mr. Freedman’s work before, but I’m not overtly familiar with him. Regardless, if the top story from 2011 is referring to Steve Jobs’s death, the title alone is a pretty insulting way to reference it.

Read it for yourself, but here are some of the main points of this ridiculous rant that attempts to make Steve Jobs look like a man that sells snake oil:

Original Macintosh

“What did this pretty beige box offer that a hundred other computers didn’t already offer, besides a higher price, much less choice in software and no compatibility with the rest of the world’s devices?”

Well, for starters, it had the first really successful, useful, graphical user interface powered by a mouse. This change in UI was so good and apparently successful that Microsoft made a really bad copy of it. I’m sure in your list of features and bang-for-buck you aren’t giving this important accomplishment much value. I just don’t see how, as an honest technology journalist, you can brush off the Macintosh as overpriced crap. Are you still working sans mouse today?

Apple Lisa

“Who remembers the Apple Lisa, a chunky desktop that sold for $9,995 in1983?”

OK. So the Lisa was a financial failure and a technological dead end thanks to the success of the Macintosh (see above). The price? Well, nobody put a gun to your head. Besides, Steve Jobs was kicked off of the Lisa team and as a result worked on the Macintosh. (see above)

Apple Newton

“Who remembers the Newton, a $700 PDA/paperweight?”

Try doing some research. You are conflating Steve Jobs with Apple. Steve Jobs left Apple in 1985. The Newton project was started in 1987. One of the first things Jobs did after becoming the Apple CEO in 1997 was kill the Newton.

NeXT

“Then there was the NeXT computer, to which Jobs devoted a decade of his life … starting at $6,500, Jobs sold only 50,000 units ever.”

Yes, the NeXT computers never sold well, but you make it sound like Jobs wasted a decade of his life on a complete failure. Maybe you didn’t know this – again, research – but the NeXT operating system was more highly regarded than the hardware. So much so that, when Apple was circling the drain after failing to build their own next-gen operating system, they purchased NeXT. This purchase is how Steve Jobs returned to Apple and also how Apple ended up with the operating system that it runs today. Without Steve Jobs’s return and that operating system – now called OSX – Apple wouldn’t exist today.

iPod

At this point you actually start giving Steve credit for creating something useful. But you still go on to piss and moan about paying higher prices for prettier things like Apple products have no real value above the competition. Never mind that you say this at a time when the rest of the consumer computer companies are struggling to build iPad and MacBook Air knock-offs at the same price point as Apple.

Discover magazine should be ashamed of themselves for publishing this misguided, lazy and factually incorrect editorial as though it were objective journalism. It makes me question everything else I read in their magazine.

Managing Your Multitudes of Passwords

I found a funny comic about password complexity this weekend: http://xkcd.com/936/

It makes a good point. And I was actually taken to that comic by an article that breaks down the futility of how we all generally manage our passwords: 

“I’m sorry, but were you actually trying to remember your comical passwords?”
by Troy Hunt 
http://www.troyhunt.com/2011/08/im-sorry-but-were-you-actually-trying.html

It’s some good food for thought. I’m certainly looking in to programs like

1Password http://agilebits.com/products/1Password

And the prominent cross-platform (Mac, Windows and Linux/*NIX) but not nearly as easy to look at …

KeePassX http://www.keepassx.org/

Why GIMP Is NOT Inadequate

Troy Sobotka, who appears to be a very accomplished commercial artist working in video, illustration and photography, made a relatively brief list of problem areas for Gimp on his blog: http://troy-sobotka.blogspot.com/2011/01/why-gimp-is-inadequate.html

He makes some good points, but the last half of his post is a lot of alarmist speculation. The obvious answer to improving Gimp is to contribute to its development. Complaints about difficult developers sounds like a bunch of complaining. With any open source project you have to earn the respect of the senior developers through consistent work, usually the not-so-exciting kind. With any open source project there are more users than developers and certainly more users suggesting ideas than making any attempt to squash bugs, write documentation or provide objective and helpful feedback. Opinions and assholes.

Anyway, I left a LONG comment today and wanted to duplicate that comment here. The only thing I should have added is a need for Gimp to continue improving color management and that’s why I just said it. Anyway, here’s my comment:

I’m a professional graphic designer. I use Photoshop and Gimp at a very high level of proficiency. Just to point out where I’m coming from. I like Pshop and Gimp for their different strengths, but some of the above arguments are wrong. Gimp certainly has room for improvement, but anyone that actually used Photoshop in 1996 knows that Pshop itself has come a LONG way in 15 years.

I would like to point out something that needs to be understood about the importance of bit-depth. I am constantly working with hi-res jpegs from a wide variety of professional photographers every day. You know how many of those files use 32 bits/channel? None. You know how many of those files use 16 bits/channel? None. They are ALL in 8 bits/channel. It’s certainly great to have the higher bit-depth options, but the importance of that capability in terms of graphic design/manipulating images for press is greatly exaggerated.

Also, CMYK color space in Photoshop is misused by graphic designers because most of them know very little about color space and/or color management. Some of us know (I don’t mean to offend anyone) but the majority of designers I have worked with are completely oblivious. I’ve even seen creative directors explicitly instruct their designers to select “discard color profile” when confronted with the “What should I do?” dialog in Photoshop. The need for CMYK color space, though useful and great, is also greatly exaggerated.

I also think the complaints about the UX are very subjective and usually only illustrate how little effort the commenter put into learning about and using the Gimp.

Two things that would greatly improve Gimp and many people’s impressions of Gimp are:

  • better image scaling/anti-aliasing algorithms
  • layer groups and layer styles

Those two things are certainly complex, but if they were implemented, and it sounds like they will be soon, I would be extremely satisfied with Gimp’s capabilities.

I think it’s healthy to critique software, but the Gimp rarely receives praise for its remarkable capabilities.

Resizing Adobe App Windows In OSX

I just realized something sweet about Adobe apps. Well, those in CS4 or newer that are running on Apple’s OSX at least:

Adobe App windows in OSX can be resized by clicking and dragging on any available edge!

This is the way all application windows work in Windows and Linux as far as I know, but Apple is unique in only providing this capability from the lower-right corner of each window. I think their reason for this is to simplify their user interface and to be consistent with the lower-right “grip” being the only indicator on most windows that they can be resized. I don’t subscribe to that reasoning.

I know it’s a small detail, but this saves me a lot of trouble, especially in Photoshop when working with multiple windows that I seem to be constantly resizing. Lately I’ve found the “full-workspace window” to be a very efficient way to work on a single file in Photoshop, but until today I was apparently wasting a lot of time moving windows by the titlebar so that I could bring the bottom of the window onto the screen and, finally, adjust the window’s size via the lower-right grip.

I generally have very few good things to say about Adobe products, but this is definitely a great feature that I hope Apple will one day propagate to all windows in OSX.

Gnome Global Menu: Apple Immigrants Rejoice!

If you are a Linux user that either used to or still does use Apple’s OSX, the Gnome Global Menu might be just what you were looking for to feel at home on Linux. At least if you’re running Gnome or XFCE.

Anybody that has every run an Apple computer with a mouse knows that every application on a Mac displays its menu bar (File, Edit, etc.) in the top-left of the system’s overall screen. This is in contrast with Windows and most Linux window managers that show each application’s menu bar within its own windows, even if that application employs more than one window. This difference is one of those things that most people love one way or the other religiously.

I’ve always preferred the Apple-way since it’s more efficient, especially when it comes to applications like Photoshop or Gimp that are frequently used with multiple windows actively being used in a non-maximized state.

I always assumed this difference was central to how each individual OS’s worked and managed windows. The Gnome Global Menu project seems to make it look pretty easy though. The only programs that don’t cooperate on my system are Firefox and OpenOffice. From what I understand this is due to both having developed their own OS-independent methods for generating their primary menu. (I have a fix for Firefox that I’ll blog about later. Check out the “Tiny Menu” addon.)

All you have to do is install the Global Menu packages and then add the Global Menu Panel Applet to your main menu bar. I also replaced Ubuntu’s custom menu applet with the single-icon Gnome Menu applet, placing it directly in the left corner with the Global Menu applet directly to its right. Looks just like home (on a Mac)! You might need to restart or log out/in to see the menus removed from all of the individual windows, but as you can see in the screenshot above, the Global Menu works great.

Add Bulk File Renaming to Apple’s OSX Finder.app

Today at work I was asked how to rename multiple JPEG files on a Mac. This individual was apparently able to accomplish this amazing feet with very little effort on a Windows system. (Every time I hear someone say how easy Windows makes something my stomach turns.) I used to have an AppleScript that did just that, but I have since lost track of that file. So I looked to the internet. Surely it’ll only take a few minutes to make this happen, right?

There is one free application available for renaming files (NameChanger) and there are several tutorials about using AppleScript and/or Automator.app. The DIY script and Automator options are okay for certain types of people, but the people that really need help will struggle to understand how to use these tools. What are all of the non-geek OSX users supposed to do?

Well, here’s another one of my small contributions to society. A free Automator.app-created workflow that will add the option ‘Rename Multiple Files’ to the contextual menu in Finder.app. Just select multiple files, right-click and select ‘Rename Multiple Files’ and away you go!

Here’s how to install this Rename Multiple Files tool:

  1. In the Finder navigate to /Users/yourname/Library/Services/
    [if “Services” doesn’t exist, create a new folder and name it likewise]
  2. Download the RenameMultipleFiles.zip, extract the contents onto your desktop (double-click in OSX)  and copy the file “Rename Multiple Files.workflow” to the previously mentioned “Services” folder.
  3. Open a Finder window with multiple files. Select all of the files. Right-click on the selected files. At the bottom of the contextual menu you will find an option titled “Rename Multiple Files”. (It may take a minute or two for this new option to become available on your contextual menu.)

Shortly after you click on “Rename Multiple Files” you will be presented with a small window and several options. To save a verbose explanation I have included screenshots of the options below.

This workflow was created on a Mac running OSX 10.6. It is dependent on Automator.app. It definitely works with other 10.6 machines, but if you are running some other version of OSX it may or may not work.

Please give me feedback about whether or not this is useful or if it doesn’t work at all. Thanks.

Enhance Your Apple Trackpad with Raging Menace’s SideTrack

Several years ago I bought an old PowerBook G3 Lombard in pieces, put it together and installed OSX 10.3. It worked surprisingly well and was good enough for email, web and other basic stuff. However, one of the biggest disappointments was how ‘dumb’ the trackpad software was. That was the first time I discovered Raging Menace and two pieces of software that they make that are completely awesome: MenuMeters and SideTrack. Last week I acquired a PowerBook G4 550 MHz laptop and remembered how necessary SideTrack was. Without it the laptop was painful to use without carrying a mouse around at all times. It makes these old trackpads just about as useful or maybe even more useful than the new multi-touch trackpads that Apple has introduced. I like this software so much that I am taking the time to introduce more people to it.

MenuMeters

Raging Menace: MenuMeters for OSXI know this is a post about enhancing Apple trackpads, but first a quick note about MenuMeters. If you’re familiar with Linux you’re probably used to having a nifty system resources ‘gauge’ that provides live information about processor activity, RAM use, network activity and more. OSX comes with an application called ‘Activity Monitor’ but it’s a resource hog and doesn’t provide a simple interface that can be visible at all times.

MenuMeters adds this feature to OSX by making this data available in the main menu bar next to your wireless network status and volume control. It takes very little resources. I don’t know exactly how little, but if you can run it on a PowerBook G3 running OSX 10.3 while being able to do OTHER things, it apparently isn’t using very many resources. It’s so excellent that it should come with OSX pre-installed. The good news? Raging Menace offers MenuMeters as a free download.

SideTrack

RM_SideTrackThis little bit of software is just as valuable and unassuming. SideTrack opens up that simple, one-purpose Apple trackpad and turns it into a powerful, multi-purpose device. Suddenly your trackpad is endowed with vertical scroll, horizontal scroll, the ability to set each corner of the trackpad to evoke a custom key command and more.

SideTrack isn’t free, but you can try it out for free and, if you find it useful, purchase a license for $15. Totally worth every penny. It’s definitely easiest to understand its many features by just downloading and installing it. However, these screenshots of the preference panes will tell you a lot.

Check out these excellent pieces of software at ragingmenace.com. You won’t regret it.

Fresh OpenOffice Templates

I was recently installing Ubuntu on an old Dell for a friend. I don’t try to push Linux on people, but if they want something cheap on an old machine I just tell them what a new version of Windows costs. At that point they either go buy a new machine instead or ask me more about Linux.

Once we get to that point I ask a them a few questions about how they use their personal computer. This recent situation called for compact disc booklet templates and a greeting card making application. In order to avoid complexity I rarely tell non-designers/tech geeks to give Inkscape, Scribus or the GIMP a try. What this means is finding some specialized application that makes the desired task super simple. If that isn’t available I turn to OpenOffice.

OpenOffice is surprisingly versatile and effective at the same time. There are also hidden benefits to using it, like dynamically generating letters for a small company with the power of OO’s mail merge tools or using embedded spreadsheets to create tables of data within a layout. Cool stuff that the professional-focused graphics tools leave to more specialized programs.

The end result, anyway, is that I decided to create some templates for OpenOffice. The related templates that the usual search engines pointed me to were not very good, so I thought providing these as free downloads might be helpful to some folks out there. What I have is a CD Booklet and Tray template and a Greeting Card template for OpenOffice Draw. Enjoy.

  1. Compact Disc Booklet + Tray template
  2. Greeting Card template

Nine Inch Nails: OSX Ghosts

If you haven’t heard, Nine Inch Nails has a new instrumental album out that is being sold directly by the artist via the web:

http://ghosts.nin.com

I gladly downloaded the free sample tracks to check it out. I’m not quite sure if I’ll purchase more or not. The true test is how entertaining the songs are while I’m sitting still on the interstate trying to get home from work in downtown Nashville.

It’s no secret that Mr. Reznor works on a Mac. I think in one of the boxed sets he’s even distributing the album songs in the GarageBand.app format to make it easy to create remixes. No offense, but I’d be more impressed if he offered them in Audacity format. Him distributing gBand files like that… well he might as well be on Apple’s payroll.

But let’s not be ungrateful bastards. He’s certainly one of the few popular artists today that understands how giving some of his source files away under a Creative Commons License is an excellent way to promote his cult of personality. Hats off.

With that said, finding a folder named ‘_MACOSX’ in the free download ZIP archive is still amusing. I wonder, does the Finder window look really cool when you open this free MP3 folder? Or is this just the side effect of how carefully they prep a ZIP archive for mass distribution? “Oh hey, let’s get that on the site tonight”.

[ right-click/Create Archive]

NIN Ghosts in OSX

X11: Switch Control Key To Apple/Command Key

One of the major problems with using X11 to run *NIX applications on OSX is switching from using the Apple/Command/⌘ key to using the Control key as your primary modifier key.

First of all, I don’t understand why the Control key is where it is on keyboards for OS’s that use it as the primary modifier key. It is probably the least ergonomic key to use (unless you have the good fortune of using a Thinkpad, since they don’t include the Windows key). Apple, for all its missteps, gets it right by making the primary modifier key easy to press in combination with other keys. Command, Control, Apple, ⌘, whatever you call it, put it in a comfortable spot! That one detail almost prevented me from switching to something other than OSX. Seriously.

With that said, it’s no surprise that Apple puts the rarely-used-in-OSX Control key off to the far corners of the keyboard. As to why Apple doesn’t include an option to switch the Control/Command keys in the X11 preferences, I can only imagine.

Second, making this change isn’t for *NIX purists that like it the way it is. Don’t get pissed at me. I’m just trying to help Mac people enjoy the fruits of the Open Source community because I’m frustrated with Microsoft and Adobe (and even Apple). Their customers take a back seat to their interest in making money.

Let’s Get Started!

This is simple and if anything goes wrong, it’s easy to get back to where you started. Here’s the meat and potatoes:

  1. Start the X11 application
  2. In X11 go to X11 > Preferences > Input tab. Make sure that the following options are UNCHECKED:
    • Follow system keyboard layout
    • Enable key equivalents under X11
  3. Close X11 Preferences.
  4. Open the Terminal.app (Applications > Utilities > Terminal.app)
  5. Type the following in the Terminal window:
    vi ~/.Xmodmap and press Enter. This will open a file named ‘.Xmodmap’ located in your home folder ‘~/’ with the text editor program called Vi. Don’t be frightened!
  6. Vi is run from within the Terminal, so it won’t look much different. Press ‘a’ to switch to Vi’s Insert Mode (I think the ‘a’ stands for ‘Append’) and then type in or copy/paste the following text:
    ! ~/.Xmodmap
    clear Mod2
    clear control
    keycode 63 = Control_L
    keycode 67 = Control_L
    add control = Control_L
  7. If you have a MacBook and want to use both the left and right ⌘ keys, use this version instead:
    ! ~/.Xmodmap
    clear Mod2
    clear control
    keycode 63 = Control_L
    keycode 67 = Control_L
    keycode 71 = Control_L
    add control = Control_L
  8. Now press ‘esc’ or the Escape key to exit the Insert Mode and return to the Command Mode.
  9. Type :wq and press Enter. This command tells Vi to Write (think ‘Save’) the changes you made to the file and Quit Vi itself.
  10. Type xmodmap ~/.Xmodmap and press Enter to complete this process.
  11. Quit Terminal.app
  12. Open something in Gimpshop, Gimp, OpenOffice, Inkscape or any X11 application that you use to test if you have successfully switched to the Apple/Command key.

If you suddenly cannot get any of your X11 applications to start, you can delete the .Xmodmap text file from your home directory. To do this, open a Terminal in either the X11/terminal or the OSX Terminal.app: rm ~/.Xmodmap and press Enter. The command rm stands for ‘Remove’. Be careful with this command. There is no ‘undo’ in the command line.

This post uses information found at //extrabright blog and The University of Illinois at Chicago’s Unix 101 pages on Vi. This is my attempt to write a more concise how-to.

IEs4Linux Also for OSX on Intel

I have been using the IEs4Linux system for a while now to assist in developing websites. It allows you to install various versions of Internet Explorer in Linux. It’s great for testing websites against the many bugs in IE as you develop them.

Recently they have developed a version for OSX on Intel machines.

http://www.tatanka.com.br/ies4linux/news/49

You have to install Darwine and X11 on OSX to use it, but after that it seems pretty easy. I am not so fortunate as to own an Intel-based Mac, so I can’t test it for you.

Wine info
http://wiki.winehq.org

Darwine info
http://darwine.sourceforge.net/download.php

Wine on OSX info
http://wiki.winehq.org/MacOSX

Adobe CS3: A Real Dud

As you can guess, I’m not all that impressed with CS3.

Photoshop made some great improvements to the Layers Palette

  1. You can finally temporarily select multiple layers with the ease of shift or command+click
  2. Creating a New Group with several selected layers is Command+G
  3. The Move tool can be sensitive to groups if you wish it so. Nice to be able to shift things around without constantly referring to the Layers Palette

I don’t use InDesign or Illustrator enough to say, but the most obvious feature across the CS3 club is that they are even bigger apps than before and they take even longer to startup than before. Oh, and they’re sluggish too. Why is editing slices such a laborious task? CS handled easily.

Then tonight I was setting up my Creative Director’s new 17″ MacBook Pro (I’m a Linux guy and all, but this is still sweet) and discovered that these apps performed much better on the new MacIntel. So maybe it’s more about being on an old Dual Proc 2GHz PowerPC with 2GB of RAM DINOSAUR that’s causing most of my disgust.

Linux and OSX: Create a Symbolic Link

‘Symbolic Links’ in Linux are pretty much the same as ‘alias’ files or ‘shortcut’ files in OSX and Windows respectively. And you can create them just as easily in any Linux Gui by right-clicking on a folder or file. However, creating or moving a symbolic link to a location outside of your user folder usually involves being the ‘super user’ or using ‘sudo’. It’s so simple to do with the Terminal, I can’t see trying to work around within the gui. So, I hope you find this helpful.

I found this info here thanks to a good friend:

http://help.hardhathosting.com/question.php/95

It’s such a good note to keep around that I wanted to have it on my own site.

In the Terminal enter the following:

ln -s [TARGET DIRECTORY OR FILE] [SHORTCUT]

For example:

ln -s /xampp/htdocs/work /Users/username/xamppwork

This points a symbolic link located in your home folder (xamppwork) to “/xampp/htdocs/work”

I am finding this to be very useful for using XAMPP to develop dynamic sites or to work the bugs out of WordPress themes. I have my working folder inside my Documents directory and then place a symbolic link to that folder inside the XAMPP server’s ‘htdocs’ directory. Pretty slick.

NeoOffice 2.1: Much Faster

The new NeoOffice 2.1 for OSX is a big improvement in optimization. Previously I was seeing a lot of redrawing in the toolbars, especially when the window is resized. Now the toolbar comes back all at once. I upgraded my parents’ 450MHz Dual G4 and noticed a considerable improvement. I’m looking forward to seeing the difference on my fiance’s PowerBook G4 400MHz.

It’s still in the ‘Early Access’ stage, so you will have to give them some money to get it, but it’s a great tool and definitely worth supporting. Here’s the site:

www.neooffice.org